

 Usechka
Most questions our support gets come down to one: the loader vanished right after download, or closes the moment it opens. Before you run a cheat for the first time, prepare the system: turn off the built-in Windows protection, shut down Microsoft Defender and remove any third-party antivirus. Below are ten steps, each with a screenshot.
Roughly nine complaints out of ten like "the cheat won't launch" or "the file disappeared" are caused by an antivirus, not by the cheat. The steps were checked on Windows 10 and Windows 11 in 2026. Do every one, in order and to the end: a half-finished setup gets you nowhere, because Defender restores its protection within a couple of minutes and blocks the loader again.
Warning: these steps remove the standard protection from your system. Do them on a gaming PC, not on a machine you use for work or banking, and only download the loader from the link you received with your key. When you finish playing you can turn the protection back on; that is covered at the end of the guide.
What you will be doing
Order matters: first Windows' own settings, then third-party antiviruses, and only at the very end Defender itself, with DControl. The full route:
- Turn off User Account Control (UAC)
- Disable Virus & threat protection
- Turn off the firewall
- Turn off Reputation-based protection (SmartScreen)
- Disable Exploit protection
- Turn off core isolation
- Remove third-party antiviruses
- Disable Defender with DControl
- Install drivers and libraries
- Sync the time
Step 1. Turn off User Account Control (UAC)
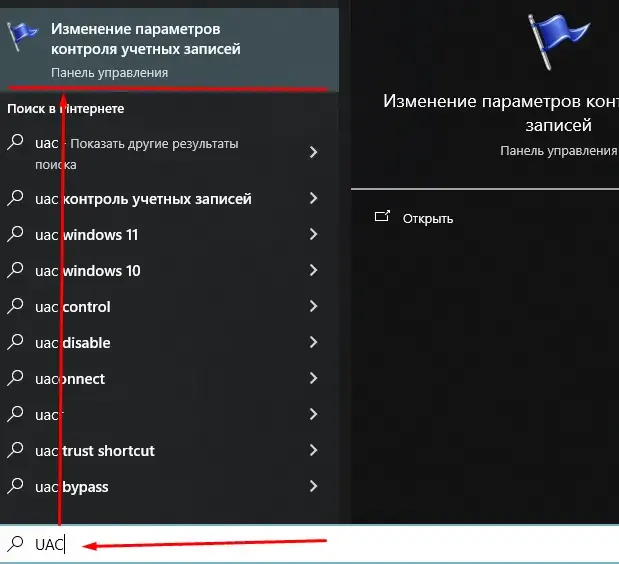
UAC is the "Do you want to allow this app to make changes" window. It stops the loader from starting with the rights it needs. In the search box next to the Start button, type UAC and open Change User Account Control settings.
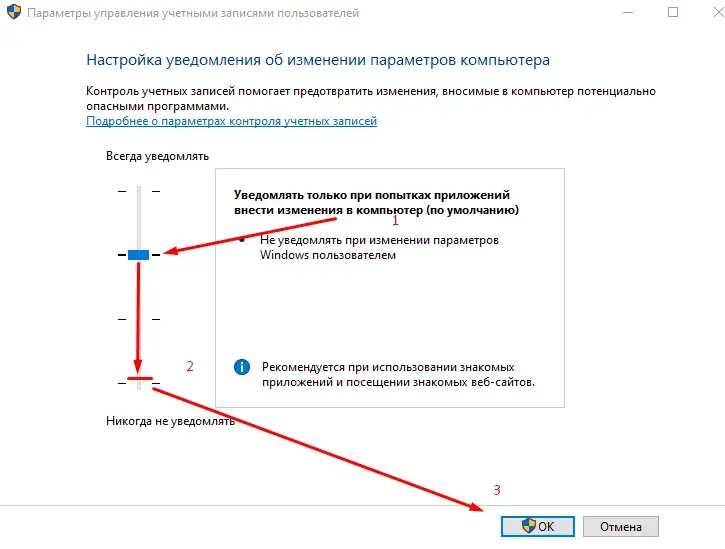
Drag the slider all the way down to Never notify, click OK and confirm the system prompt.
Step 2. Disable Virus & threat protection
This is the core of Microsoft Defender. Open Settings, then Update & Security, Windows Security and Virus & threat protection. Under Manage settings switch every toggle to Off:
- Real-time protection
- Cloud-delivered protection
- Automatic sample submission
- Tamper Protection
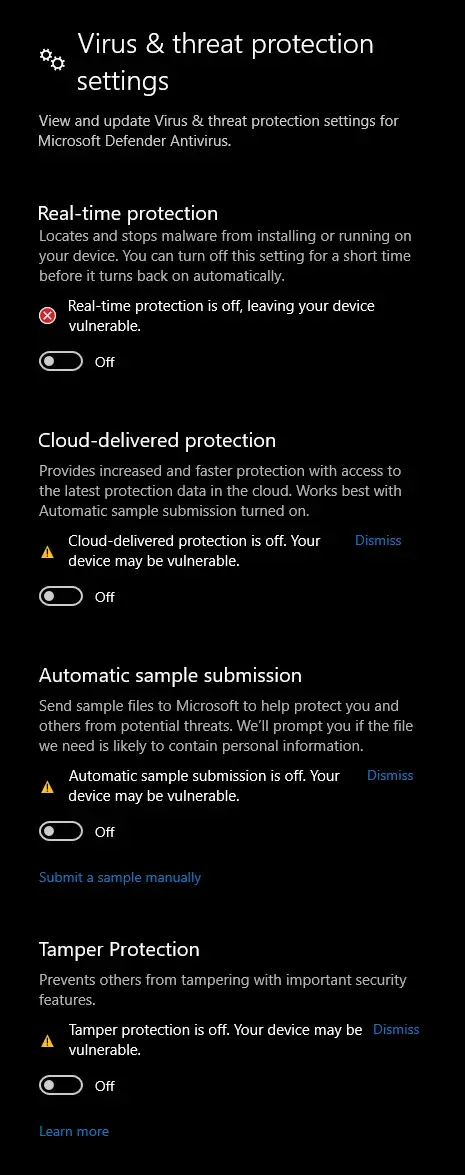
Turn off Tamper Protection first. While it is on, Defender switches the other toggles back on by itself.
Step 3. Turn off the firewall
The firewall can cut the loader off from its license server. In Windows Security open Firewall & network protection and turn protection off for all three profiles: Domain network, Private network and Public network.
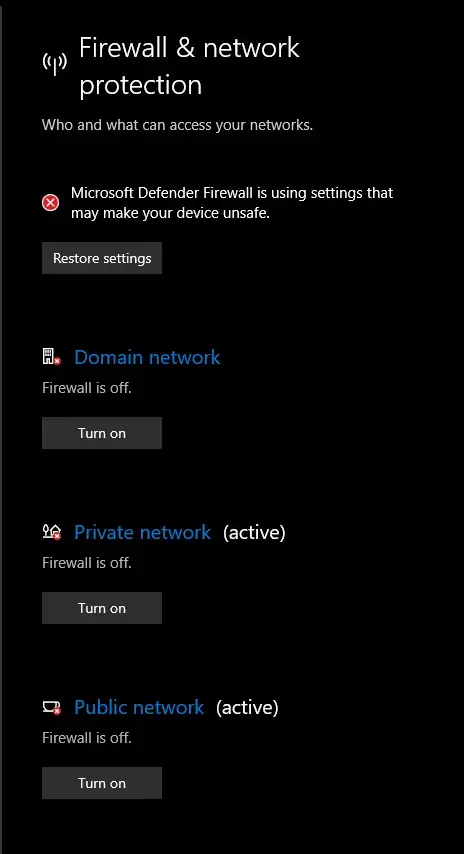
Step 4. Turn off Reputation-based protection
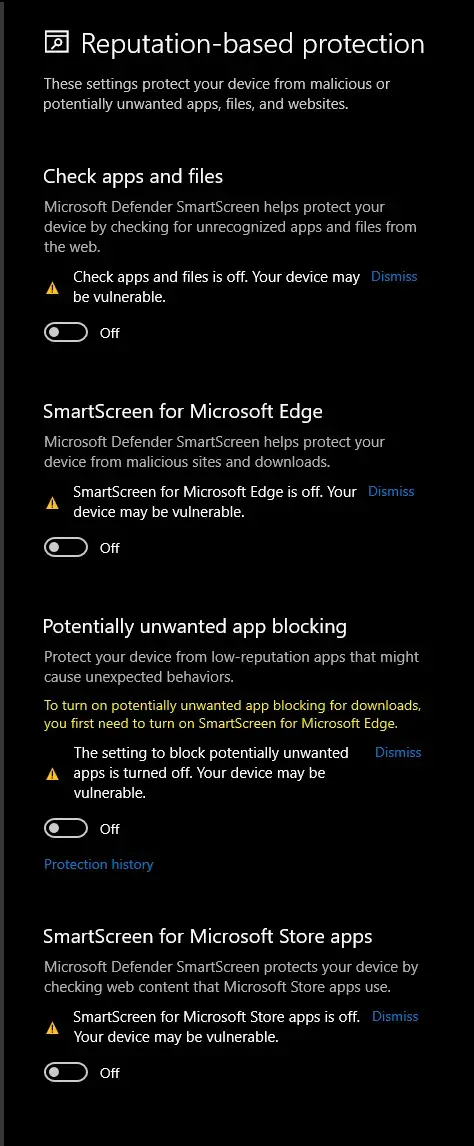
SmartScreen blocks anything unknown, and a loader is exactly that: new, with no reputation. Go to App & browser control, then Reputation-based protection settings, and turn off:
- Check apps and files
- SmartScreen for Microsoft Edge
- Potentially unwanted app blocking
- SmartScreen for Microsoft Store apps
Step 5. Turn off Exploit protection
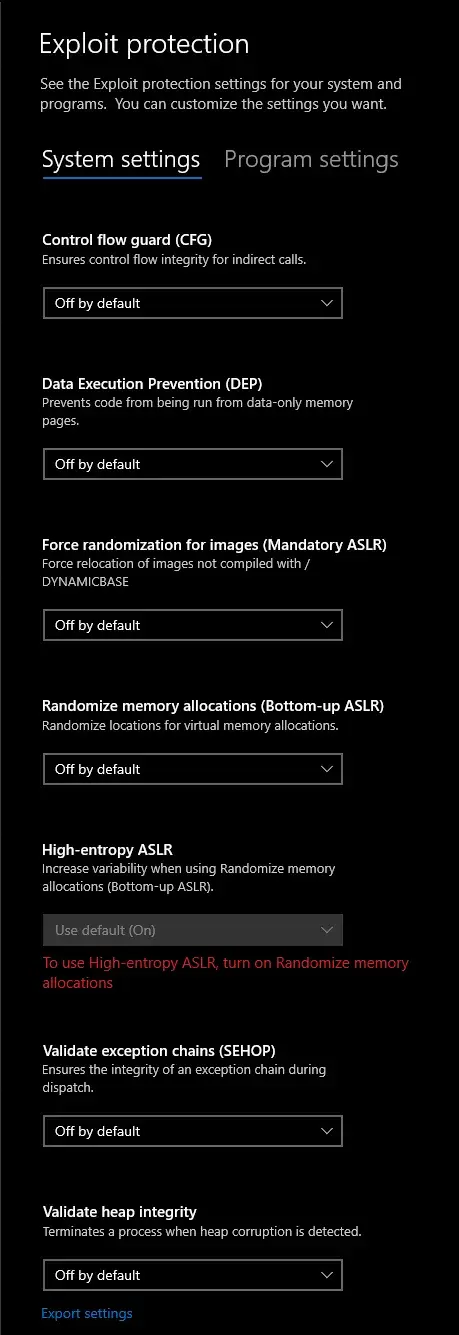
In the same App & browser control section, scroll down to Exploit protection and open its settings. On the System settings tab, set every item (CFG, DEP, ASLR, SEHOP and the rest) to Off by default.
Step 6. Turn off core isolation
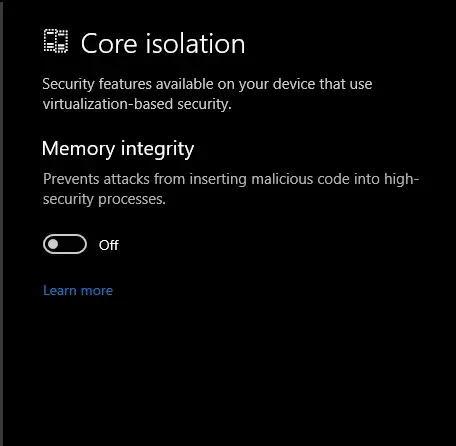
Memory integrity is a virtualization feature that can stop a cheat's driver from loading. Open Device security, then Core isolation details, and switch Memory integrity to Off. Windows asks for a restart; accept it.
Step 7. Remove third-party antiviruses
A third-party antivirus has to be uninstalled through Control Panel, not just switched off: disabled, it still deletes the loader in most cases. Remove every program like these:
- FACEIT Anti-Cheat
- Riot Vanguard
- 360 Total Security
- ESET
- Dr.Web
- Malwarebytes
- Avira
- Avast
- McAfee
- any other antivirus you have installed
The list is not exhaustive: any other security software goes too. Anti-cheats such as Vanguard and FACEIT are uninstalled as well, because they run at driver level and clash with the loader.
Step 8. Disable Defender with DControl
The final step, and only after all the ones above. DControl (Defender Control) shuts Defender down completely, and it does not come back on by itself before a restart.
- Download Defender Control from its author's site, sordum.org
- Unpack it and run the file as administrator
- Click the red Disable Windows Defender button
When the window header turns red and reads "Windows Defender is turned off", protection is off.
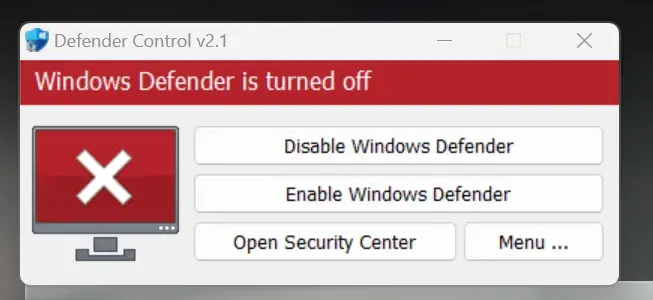
The Enable Windows Defender button in the same window brings Defender back.
Step 9. Install drivers and libraries
So the loader does not crash on startup, the system needs current components:
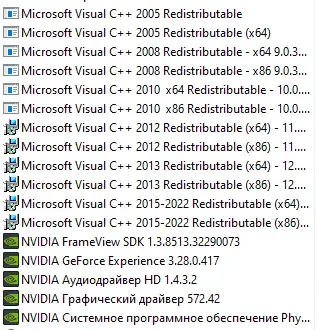
- Microsoft Visual C++ Redistributable 2005-2022, every x86 and x64 version, from Microsoft
- The latest graphics driver from NVIDIA or AMD
Check what is already installed under Apps & features; the list should look roughly like this. Every other runtime a loader can ask for is linked on our support page.
Step 10. Sync the time
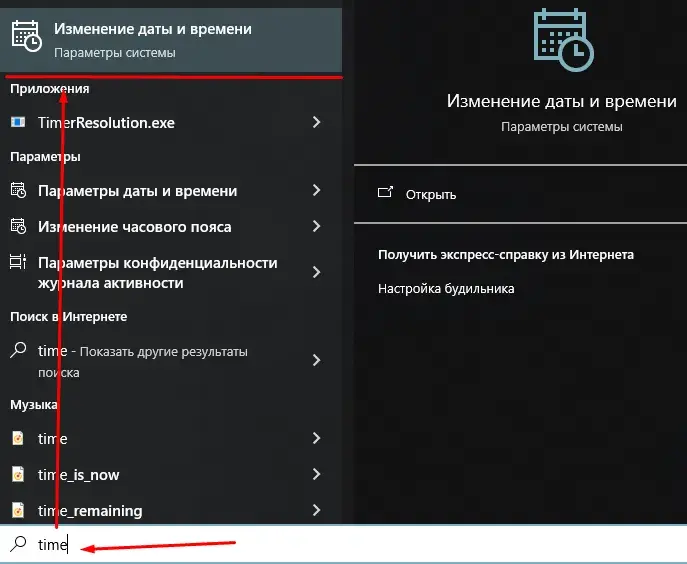
The loader checks the license against the clock, and a wrong time is a common cause of activation errors. In the search box next to the Start button, type time and open Change date and time.
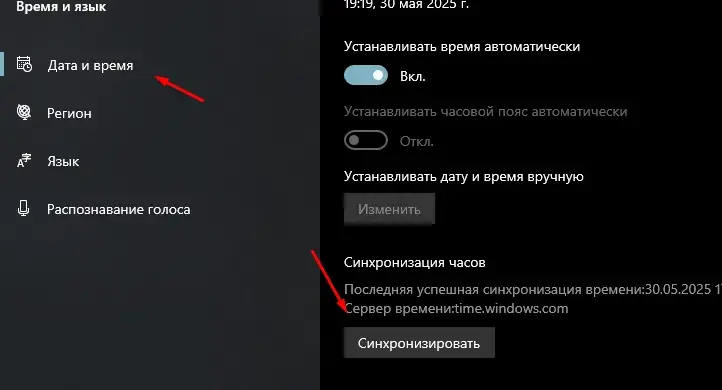
Under Synchronize your clock click Sync now, and make sure the time zone is right.
Done: what next
Restart the computer so the UAC and core isolation changes take effect. Then download the loader again from the link that came with your key and run it as administrator. If Defender deleted your earlier copy, download it again now that protection is off.
Before you launch, check that the build is undetected on the status page: a cheat on update will not start however well the system is prepared. If the loader still refuses after every step, message us on Discord or go through the support page, and we will look at your specific error.